Bij het ontwerpen van de gebruikersinterface voor de CNC-machine in onze productieplant staat gebruiksvriendelijkheid centraal.
De interface is geoptimaliseerd om operators snel en nauwkeurig door elke stap van het productieproces te leiden, van het scannen van barcodes tot het installeren van kastdeuren. Met een heldere weergave van 3D-modellen en visuele instructies die de plaatsing van panelen en de positie van gaten aangeven, kunnen werknemers met een enkele blik de nodige acties ondernemen. De intuïtieve lay-out en iconografie verminderen de noodzaak voor uitgebreide uitleg en versnellen de workflow, terwijl realtime gegevens over productie-items en -taken eenvoudig toegankelijk zijn. Deze benadering stelt ons in staat om de efficiëntie te maximaliseren en de foutmarges te minimaliseren, wat leidt tot een gestroomlijnde productie van meubels die voldoet aan de hoogste normen.
Here you see one instruction: Scan productie-item. After scanning you can see how the panel is placed and you can take a look at the machine. By turning the 3D visual you can inspect the whole machine.
In three steps how to mount a sliding door.
Begin by scanning the barcode. Ivenza gets the data and then you see the three steps to go through:
What do you need?
(This should be fetched)
Then
1. Mount the back
2. Mount the front
3. Check the accessories
Then scan print the label and when ready go to the next production-item
This is a look at what scenarios there are on the machine. In this case we choose a sliding door closet with all the info on the stickers bar code. By clicking on the scenarios button we can select one scenario and see all the info that goes with it.
The manager production item number, properties like status, description, article type actions ( print label or DXF export), history, production tasks, handling, label 3D design drawing with the possibility to turn around and check.
Packaging job shop shows by scanning the production item what should be packaged and printed on this workstation. For a check-up, you see the number of items, the width, length, height, and mass weight.

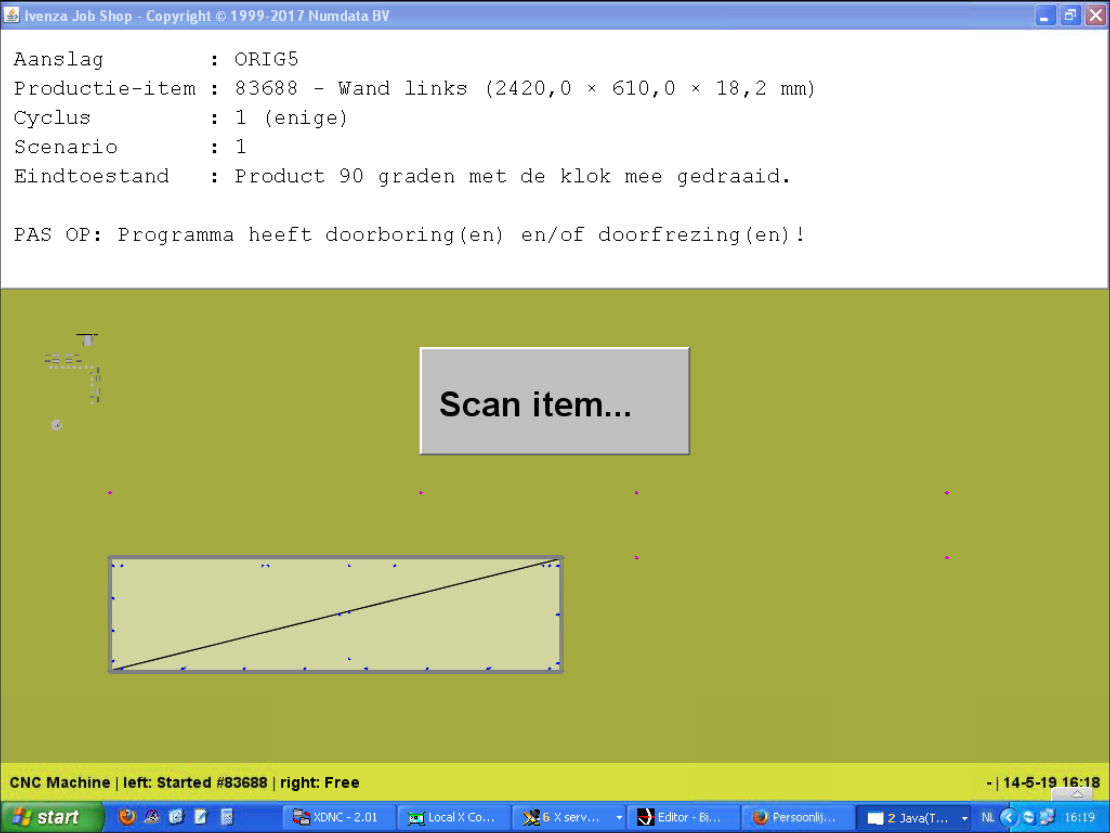
This is a screenshot of how it was before changing into more useable information.
On the panel, we scan the sticker and this is what you see on the screen near the machine. It shows how the panel should be placed on the machine. Here you can see where the holes should be drilled. Above the drawing you see information about aanslag, productie- item, cyclus scenario, eindtoestand and a warning: PAS OP…
This is coded in JAVA.

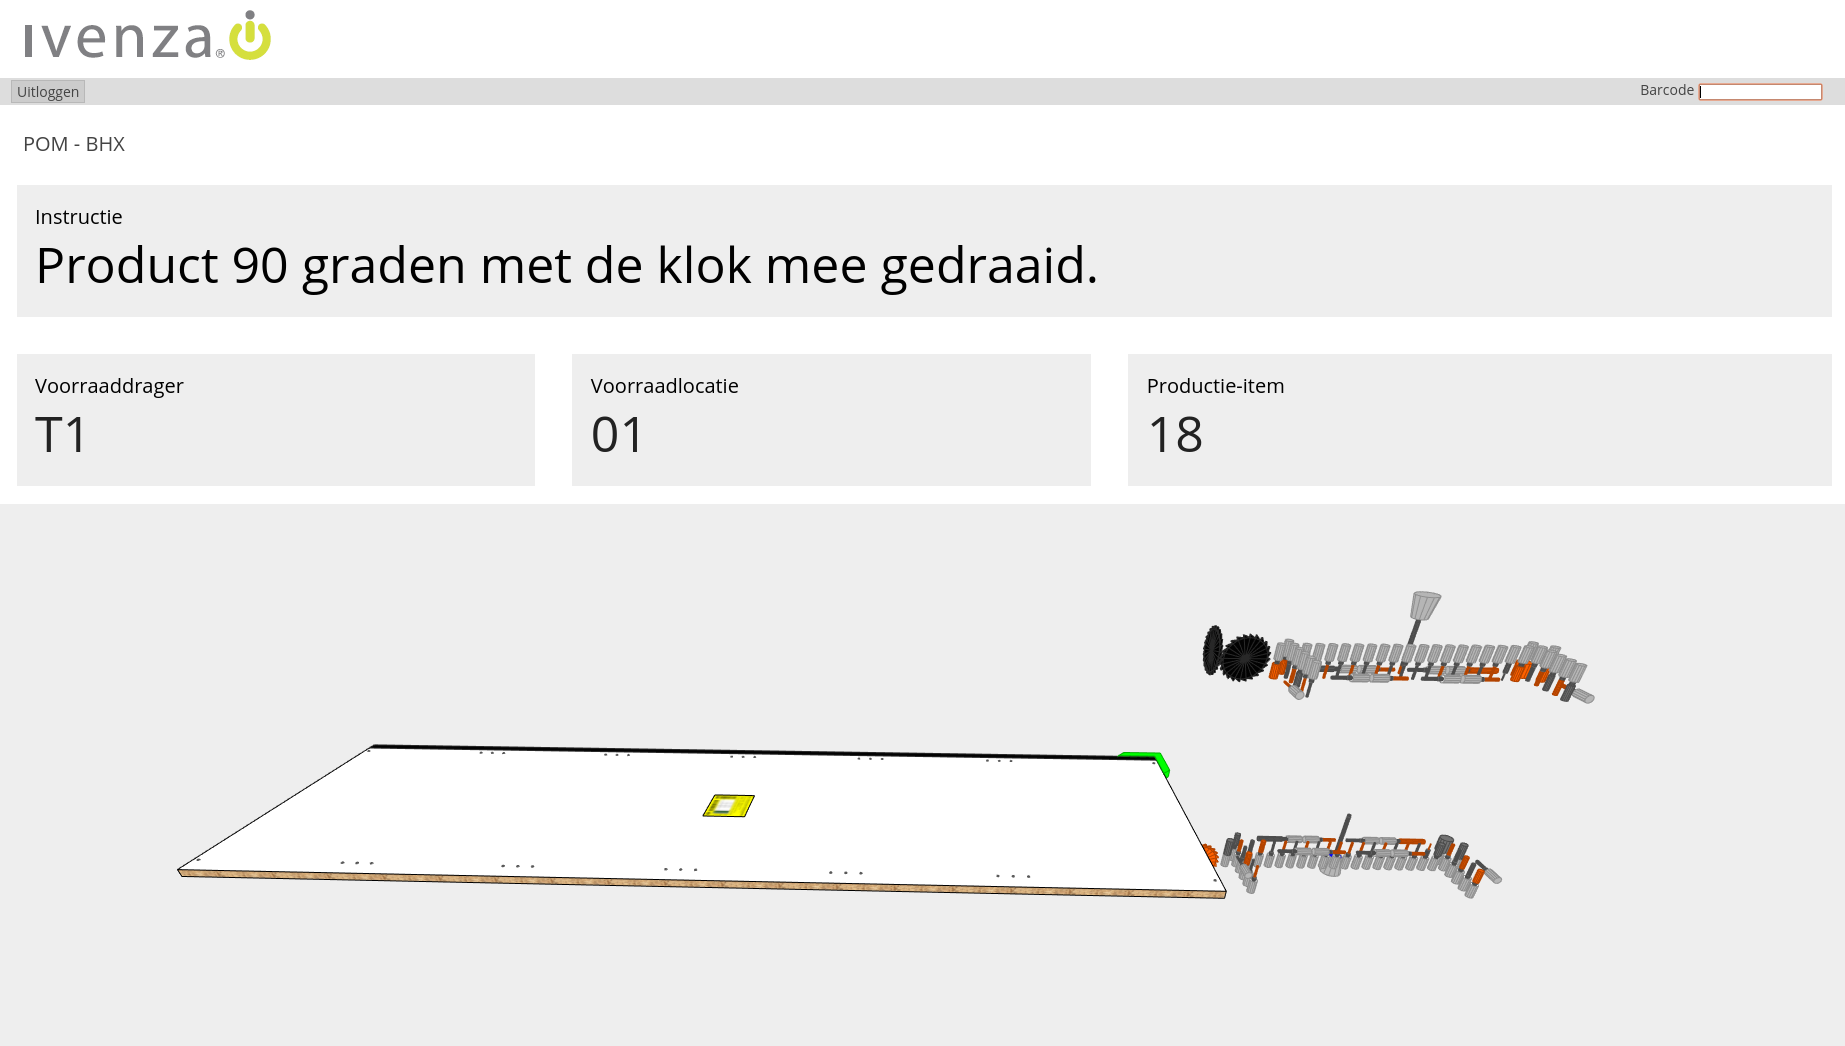
This is the result of a more userfriendly information screen. What information is most useful to the user? And how is it more clear without reading but looking at it at a glance in a more iconic way. By presenting the panel in 3D and showing the drilling above and beneath the panel it gets clear.
The orange drills are left turning drills, the grey right turning. Here you can have a control if the drills are placed in the right way.
When the instruction is followed it is possible with a scan to turn on the machine.
This can be showed in a browser, online in a hostingcenter and via cloudsytem. Also on a PC, where ever to have a look elsewhere.
This is coded in Javascript and WebGL with React.
